These instructions pertain to filing a party's briefs and
appendices. For general information, screenshots, and
step-by-step instructions for filing electronically see Filing
a document. For information on filing an amicus brief see Documents filed by non-parties.
1. Prepare the brief or appendix. Save it as a searchable PDF.
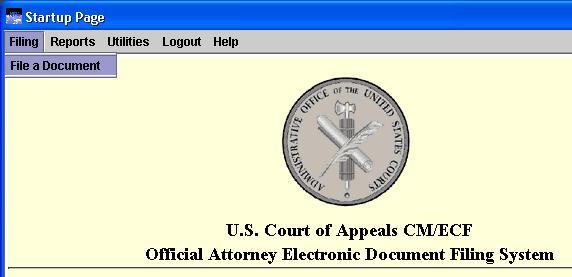
2. Log in to CM/ECF. On the startup page, select Filing > File a Document.
3. On the File a Document screen, enter the case number in the
Case field and hit the Tab key on the keyboard. The case number and name appear in the
Case Selection box toward the bottom of the screen.
4. On the left side of the screen, select Briefs/Appendices
(selected by default). On the right side of the screen, select the type of brief or appendix being filed.
View instructions on filing an amicus brief. In the example below,
Appellant/Petitioner Brief & Appendix FILED is selected.
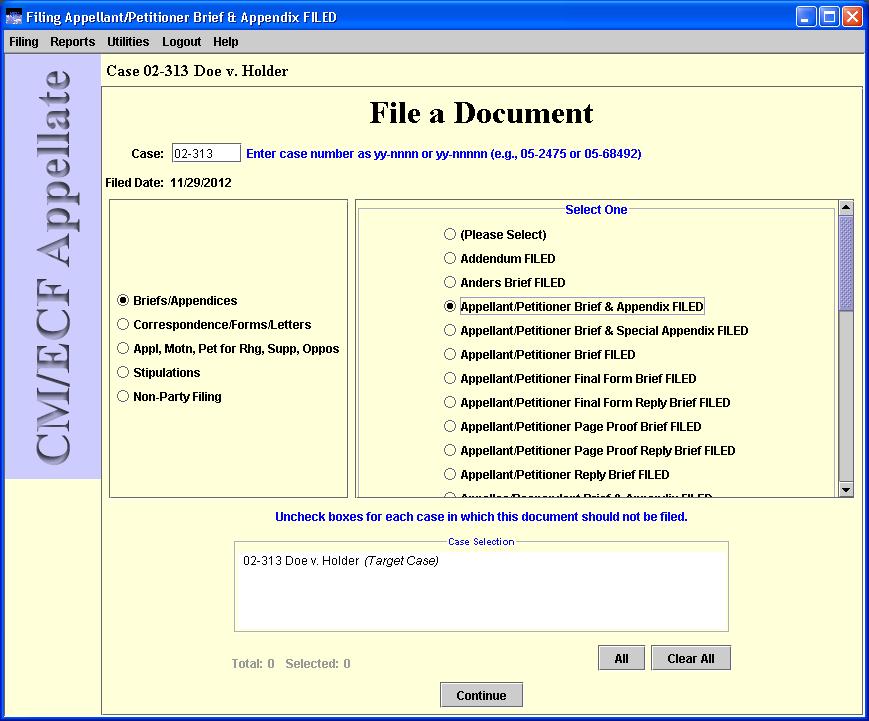
At the bottom of the screen, click the Continue button.
Depending on the type of filing selected, an Event Preconditions dialog box may open. If this dialog box appears, carefully review the information.

Click the OK button.
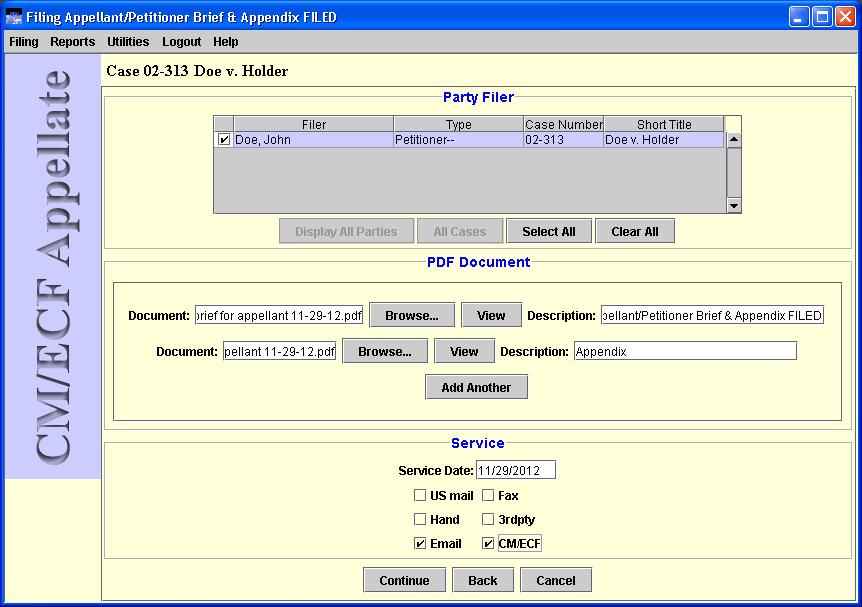
The screen that opens is divided into three sections: Party Filer, PDF Document, and Service.
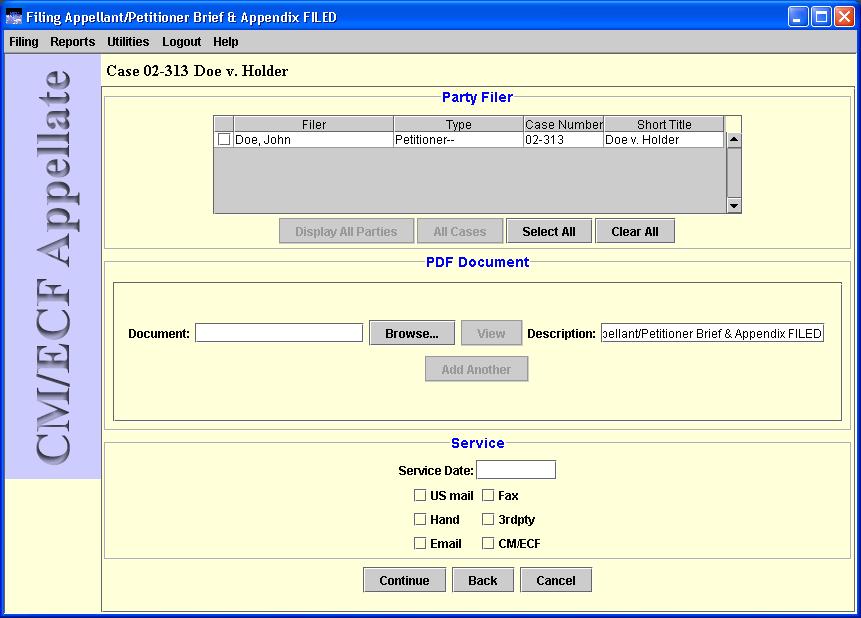
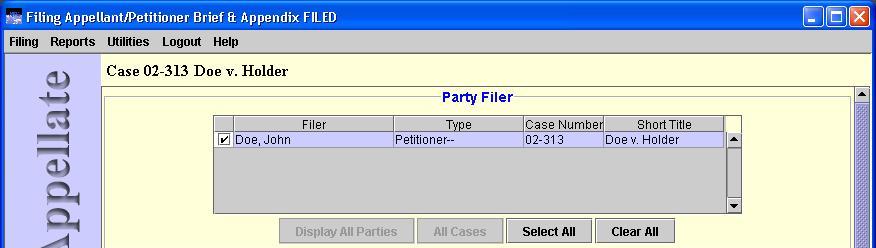
5. In the Party Filer section at the top of the screen, click the box to the left of the filer on whose behalf the petition is filed. See
Selecting the filing party for step-by-step instructions.
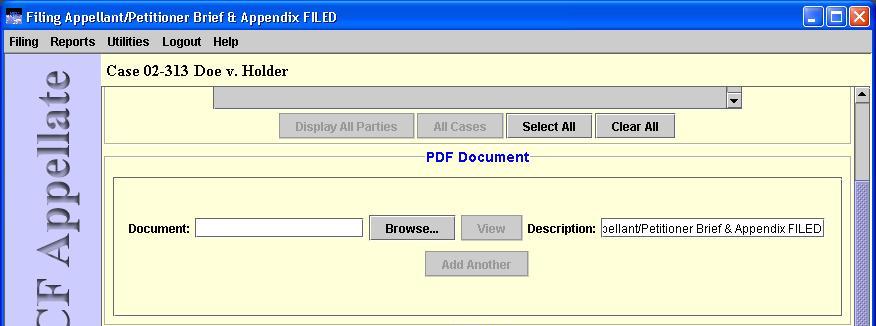
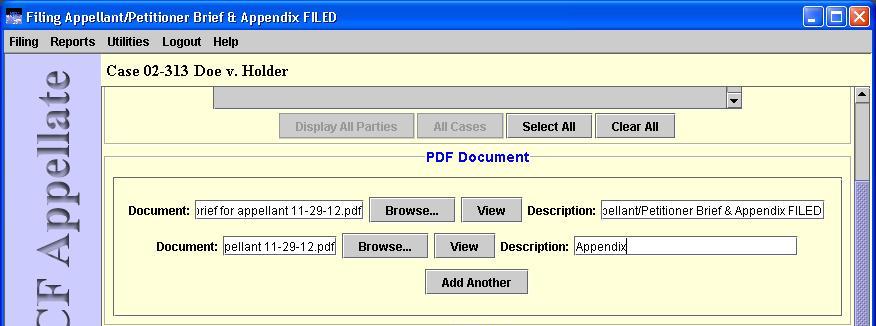
6. Scroll down to the PDF Document section in the middle of the screen to upload the brief and appendix. Click the
Browse button to the right of the Document box to navigate to the brief saved on the filer's computer.
A dialog box titled Select PDF Document opens. Use the Look in
pull-down list at the top of the dialog box to navigate to the folder containing the PDF. Select the PDF file to attach by clicking the file name. The file name appears in the
File name field near the bottom of the dialog box.
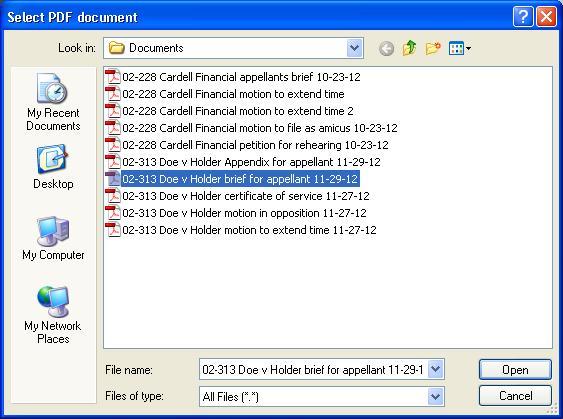
Click the Open button at the bottom right of the dialog box. The Select PDF document
dialog box closes and CM/ECF displays in the Document box the selected file with the full path. The system automatically fills in the
Description box with the selection made on the previous screen.
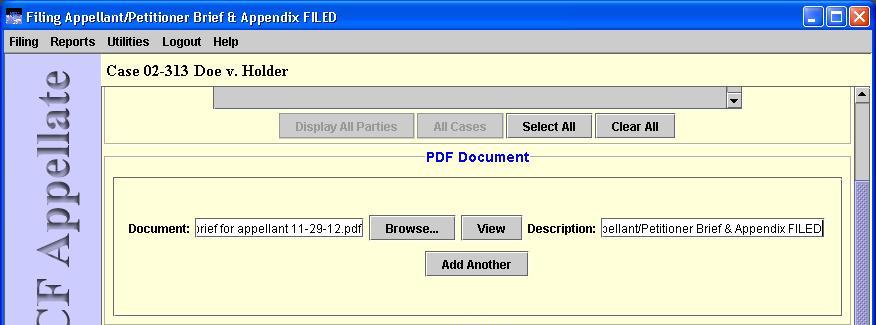
The View button now is active. To verify that the correct document is uploaded, click the View button to open the uploaded PDF.
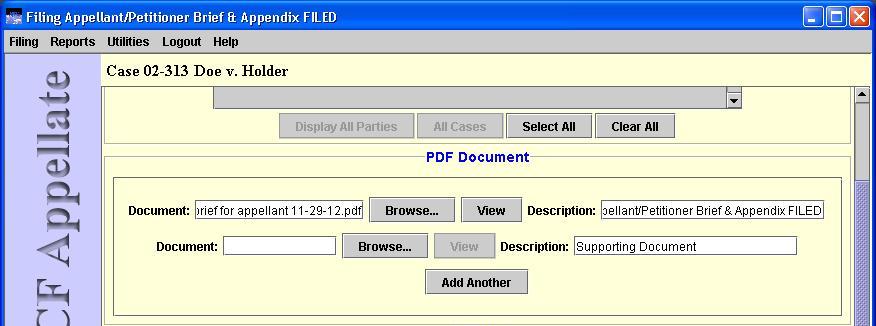
7. To attach another document needed for this filing (e.g., a certificate of service), click the
Add Another button. The PDF Document area expands to include another
Document box, another Browse button, and a
Description box for the second document.
Click the new Browse button and select the file in the Select PDF Document dialog box, as above. Click the OK button.
When the additional document -- in this example, the appendix -- is uploaded, the file name appears in the second Document box. The View button is active for the filer to verify that the correct document is uploaded. The second Description box default entry is "Supporting Document." Edit the text in the Description box to describe the uploaded document.
NOTE: The certificate of service need not be a separate document. The certificate of service can be part of the main document attached to the filing.
To attach another document to the filing, repeat step 7.
8. When all documents are attached and described, scroll down to the
Service section of the screen. Enter the service date (today's date or earlier date on which service is made) in mm/dd/yyyy format in the
Service Date box. (To generate a service list, click
Reports > Service List at the top of the screen. The service list search screen opens in a new browser window.)
Click the checkbox(es) corresponding to the type(s) of service employed.
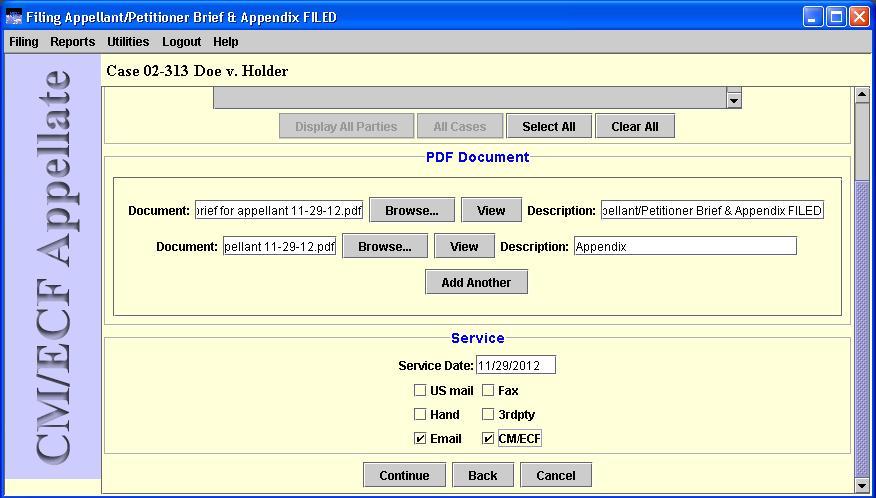
When the party filer is selected, all documents for this filing are uploaded and described, and the service date is entered and service means selected, click the
Continue button at the bottom of the screen.
9. The Docket Text dialog box opens to show the text of the entry as it will appear on the docket report once the filing is complete. The text in this dialog box cannot be changed.

Review the text of the docket entry for the filing. If any changes to the filing are necessary, click the
Back button to return to earlier screens in the filing process.
10. Click the Continue button. The Event Review dialog box opens.
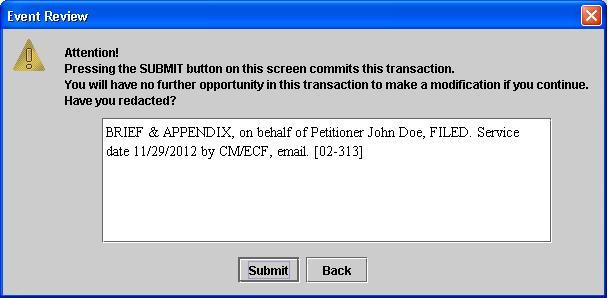
The text in the white box can be edited. Make any necessary redactions. DO NOT EDIT numbers in brackets. The preferred method for editing this text is to click the
Back button to return to earlier screens in the filing process and make the appropriate changes on those screens.
Click the Submit button to confirm the filing. A pop-up box opens to verify that the event is docketed.
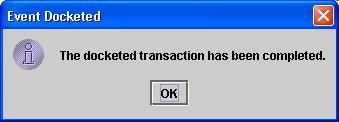
Click the
OK button.
10. The docketing screen reopens, and the Notice of Docket Activity (NDA) - identical to the email sent to opposing counsel - simultaneously opens in a browser.

NOTE: If the notice does not appear in a new browser window, check the browser's pop-up blocker settings. Pop-ups from the Court's site must be allowed.
To close the browser, click the red X in the upper right-hand corner. Continue working in CM/ECF or log out of the system.
Last modified at 2/5/2013
|